
 Español
Black Deck Balusters: Complete Guide to Materials, Installation & Costs
News-Content
- 1 No Deck Is Safe Without Proper Balusters
- 2 Why Choose Black Deck Balusters?
- 3 Black Baluster Materials: Aluminum vs Steel vs Composite
- 4 Key Specifications: Length, Finish, and Spacing Codes
- 5 Top Brands and What They Offer
- 6 How Many Balusters Do You Really Need?
- 7 DIY Installation Step by Step
- 8 DIY vs Pro Installation: The Real Cost Difference
- 9 Maintenance That Keeps Black Balusters Looking New
No Deck Is Safe Without Proper Balusters
A deck surface more than 30 inches above ground must have a guardrail — and the balusters inside that rail can’t be more than 4 inches apart. That’s not opinion; it’s the International Residential Code (IRC) requirement adopted across most U.S. municipalities. Black deck balusters have become the go‑to choice for contractors and DIYers who want a clean, modern look without constant upkeep. They hide dirt better than white, create sharp contrast against wood or composite railings, and allow an unobstructed view of the yard.
But choosing a black baluster isn’t just about picking a color. Material, length, finish quality, and spacing compliance all affect safety, longevity, and the final project cost. This guide breaks down each decision point — from aluminum vs steel trade‑offs to precise spacing calculations — so you can buy with confidence.
Why Choose Black Deck Balusters?
Black balusters deliver a trim, architectural line that works equally well on traditional wood decks and on contemporary composite builds. Their dark profile recedes visually, putting the focus on the landscape beyond rather than the railing itself. That’s one reason they’ve dominated new deck construction for the past five years.
The practical advantages stack up fast:
- Low‑maintenance appearance — Powder‑coated black finishes mask dust, pollen, and water spots far better than white or bronze. A quarterly rinse keeps them looking fresh.
- Design versatility — Straight, twisted, or basket‑weave patterns in black complement farmhouse, modern, and craftsman‑style homes without clashing.
- Corrosion resistance — When made from aluminum with a quality polyester powder coat, black balusters withstand salt air and heavy rain far longer than untreated steel.
- Code‑ready dimensions — Most 29.5‑inch and 32‑inch balusters are engineered to achieve finished railing heights of 36 or 42 inches, the two most common IRC prescriptive heights.
If you’re already upgrading your railing, consider whether a full‑system swap makes more sense than piecemeal baluster replacement. A complete aluminum fence panel eliminates the need to calculate individual baluster spacing and delivers a seamless, factory‑finished appearance.
Black Baluster Materials: Aluminum vs Steel vs Composite
Material is the single biggest cost and performance differentiator. Most residential decks use either aluminum or steel balusters; composite versions exist but remain a niche option limited to specific railing systems. Here’s how they compare.
| Factor | Aluminum | Steel | Composite |
|---|---|---|---|
| Weight (per 32‑in. baluster) | 0.4 – 0.6 lb | 1.2 – 1.8 lb | 0.5 – 0.8 lb |
| Corrosion resistance | Excellent — does not rust | Moderate — needs flawless coating | Excellent — moisture‑proof |
| Typical price per piece | $3.00 – $7.00 | $2.50 – $5.00 | $5.00 – $9.00 |
| Cutting difficulty | Easy — standard carbide blade | Hard — requires metal cutting blade | Easy — standard wood blade |
| Finish durability | Powder coat; 10–25 year life | Powder coat; chips can lead to rust | Molded‑in color; fade‑resistant |
| Best for | Coastal areas, DIY installs | Tight budgets, inland climates | System‑matched railings |
Aluminum’s light weight makes it dramatically easier to handle on large decks. You’ll drill fewer pilot holes into rails because the balusters don’t sag under their own weight the way steel can. And in any environment where salt or humidity is present — beach towns, lakefronts — aluminum is the undisputed winner. Steel balusters cost less upfront, but a single scratch through the coating can start rust within one season.
Composite black balusters typically come bundled with a specific brand’s railing kit. They perform well but lock you into that ecosystem, making later repairs or styling changes harder.
Key Specifications: Length, Finish, and Spacing Codes
Baluster length determines the finished railing height. The most common options on the shelf are:
- 29.5 inches — produces a 36‑inch finished rail (standard for residential decks)
- 32 inches — produces a 42‑inch finished rail (required in some jurisdictions for commercial or high decks)
- 36 inches — used when a taller bottom rail is present; less common
- 42 inches — for privacy screens or very high platforms
Always measure from the deck surface to the top of the intended handrail before ordering. If your deck sits 48 inches above grade, local code may still demand a 42‑inch guard — length choice isn’t optional.
The powder‑coat specification matters just as much as length. A thick, UV‑stabilized polyester coating should be at least 60–80 microns and pass a salt‑spray test (ASTM B117) of 1,000 hours or more without blistering. Balusters that meet this threshold will stay black for a decade, not three years.
The spacing rule is non‑negotiable: a 4‑inch sphere must not pass between any two balusters at any point. This translates to a center‑to‑center spacing of roughly 4.5 to 5 inches, depending on baluster width. For square ¾‑inch aluminum balusters, a 4‑inch gap between inside edges usually satisfies the test while preserving sightlines.
Top Brands and What They Offer
Several manufacturers dominate the black aluminum baluster market. While deck supply houses stock multiple lines, these three appear consistently in professional builds:
- Deckorators Classic Aluminum Balusters — Sold in 10‑packs, available in 29.5‑ and 32‑inch lengths. The heavy‑gauge aluminum carries a limited lifetime warranty. Their rectangular profile and flat face give a sturdy, traditional appearance. The powder coat resists fading under intense sun.
- Finyl Line Round Aluminum Balusters — Commonly bundled with vinyl railing kits, these hollow round balusters come in 32‑inch lengths and a true black finish. They’re lighter than Deckorators’ rectangular version but still carry a solid warranty. Great for perimeter railing where weight reduction speeds up installation.
- Brand‑agnostic import balusters (Amazon, eBay) — Packs of 15–60 pieces at lower per‑unit prices. Quality varies; always verify the coating thickness and whether the metal is extruded or formed. The savings can be real, but so is the risk of uneven lengths or thin powder that scratches during installation.
No matter the brand, check that the balusters are compatible with your top and bottom rail connectors. Most aluminum balusters use pre‑drilled brackets or snap‑in connectors; buying a mismatched set will force you into custom drilling that voids any appearance guarantee.
How Many Balusters Do You Really Need?
Ordering too few balusters grinds a project to a halt; ordering too many blows the budget. Use this formula for any straight railing section:
Number of balusters = (Railing length in inches ÷ Center‑to‑center spacing) + 1
For common deck railing spans, the numbers break down like this:
| Railing Length | 4‑in. gap (5‑in. centers) | 5‑in. gap (6‑in. centers) |
|---|---|---|
| 6 feet (72 in.) | 15 balusters | 13 balusters |
| 8 feet (96 in.) | 20 balusters | 17 balusters |
| 10 feet (120 in.) | 25 balusters | 21 balusters |
Always round up. A 4‑inch sphere test is unforgiving, and inspectors carry a tape measure. For stairs, measure along the angle of the stair rail and use the same formula; you’ll typically need 2–3 extra balusters per stair flight compared to a level section of equivalent horizontal distance.
DIY Installation Step by Step
Installing black aluminum balusters is a straightforward weekend project for anyone comfortable with a drill and a level. Steel balusters add the extra step of metal cutting, but the process is otherwise identical.
- Measure and mark the top and bottom rails. Find the exact center of the railing bay. Lay out your spacing marks starting from the center outward so any partial space at the ends will be symmetrical — code only cares about the maximum gap, not equal spacing, but symmetry looks professional.
- Drill mounting holes. Aluminum balusters typically use ¾‑inch or 1‑inch holes depending on the connector type. Use a sharp brad‑point bit for wood rails or a carbide bit for composite. Drill completely through the bottom rail and at least ½ inch into the top rail.
- Install bottom connectors. Many systems use a snap‑in base connector screwed to the bottom rail. Insert the connector and secure it with the provided stainless steel screw. A drop of construction adhesive inside the hole adds vibration resistance.
- Insert each baluster. Slide the baluster down into the bottom connector, then guide the top end into the upper rail hole or connector. Press firmly until it seats. No hammering — aluminum can deform.
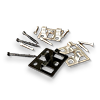
- Secure with top connectors or set screws. Depending on the system, either snap a top trim piece in place or tighten a tiny set screw that locks the baluster from inside the upper rail. A hidden‑fastener design, like the connectors in our decking fastener system, eliminates visible screw heads and speeds up future cleaning.
- Check level and spacing one more time. Walk the entire railing with a 4‑inch ball or a simple cardboard template. Any gap that admits the ball must be corrected before the final handrail goes on.
The whole job for an average 8‑foot section takes about 45 minutes once the first section is measured. Most of the time goes into layout — cutting and drilling go fast.
DIY vs Pro Installation: The Real Cost Difference
Labor is the biggest variable. A deck contractor typically charges $15 to $25 per baluster to remove old spindles and install new aluminum ones. At $20 per baluster, a 10‑foot section needing 25 balusters runs $500 in labor alone. Do it yourself, and that same section costs just $75–$175 in materials.
For a whole deck with 150 linear feet of railing, the numbers amplify:
| Cost Category | DIY | Professional Install |
|---|---|---|
| Balusters (approx. 375 units) | $1,300 – $2,600 | $1,300 – $2,600 |
| Connectors & hardware | $200 – $400 | included in labor |
| Labor | $0 | $5,625 – $9,375 |
| Total project cost | $1,500 – $3,000 | $6,925 – $11,975 |
The swing is large enough that many homeowners buy a high‑end aluminum baluster and still come out thousands ahead by doing the work themselves. The only caution: local building codes may mandate a licensed contractor for any structural railing work. Call your permitting office before you buy materials.
Maintenance That Keeps Black Balusters Looking New
Black powder‑coated balusters don’t demand much, but they do demand consistency. A quarterly wash with mild dish soap and water removes salt spray, pollen, and grime before it bonds to the coating. Avoid abrasive scrubbers; a microfiber mitt is all you need.
Scratches from ladders or furniture should be touched up immediately. Most manufacturers sell matching aerosol touch‑up paint. Lightly sand the scratch with 400‑grit paper, clean it with alcohol, and spray a thin coat. Even a small exposed patch on a steel baluster will rust within weeks in humid climates — aluminum won’t rust, but a bare spot still dulls the finish.
Inspect the connectors and set screws once a year as well. Temperature swings can loosen the tiny lock screws that hold each baluster in place. A 30‑second walk down the railing with a hex key is cheap insurance against a wobbly guardrail.
Our News //
Related News
-
Email: [email protected]
Email: [email protected] -
Tel: +86 13732382108
Tel: +86 18705821696 -
 BLDG#1, LONGOUANWU ECO-INDUSTRIALPARK, MIAOXITOWN, WUXINGDISTRICT. HUZHOU. CHINA

Quick Links
Products Center
Copyright © 2025 Huzhou Baosheng New Material Co., Ltd.All Rights Reserved. Composite Decking Manufacturers Composite Cladding Factory
