
 Español
Sleeper Deck System: Low-Profile Support for Rooftop & Concrete Decks
News-Content
- 1 What Is a Sleeper Deck System?
- 2 Types of Sleeper Deck Systems: Material & Performance Comparison
- 3 Step-by-Step Installation Guide for Concrete & Rooftop Decks
- 4 Cost Breakdown: Sleeper System vs. Traditional Wood Sleepers
- 5 Common Mistakes to Avoid When Installing a Sleeper System
- 6 How to Choose the Right Decking for Your Sleeper System
What Is a Sleeper Deck System?
A sleeper deck system is a low-clearance support structure that lifts deck boards just enough to keep them dry. It solves a problem traditional elevated decks never face: standing water on flat or nearly flat surfaces. Rooftops, concrete patios, and plazas all trap moisture. A sleeper system prevents that moisture from rotting the underside of your decking.
The concept is straightforward. Instead of deep footings and tall joists, you use low-profile beams—sleepers—laid directly on the existing hard surface. The sleepers create a drainage gap, usually 2 to 3 inches, between the deck boards and the wet substrate. This keeps the wood or composite material out of puddles and accelerates drying after rain.
Most sleeper systems are installed on concrete slabs or over roofing membranes. They are a go-to choice for urban rooftop terraces, ground-level patios with poor drainage, and any space where you cannot—or should not—dig. The system's height is a fraction of a standard joist frame, which means fewer steps, no rail height conflicts, and a faster build.
Unlike traditional wooden sleepers, modern high-performance systems are made from moisture-impervious materials such as glass-fiber reinforced polymer or aluminum. This matters because wood sleepers sitting in a wet environment can wick moisture and eventually rot, undermining the entire deck.
Types of Sleeper Deck Systems: Material & Performance Comparison
Not all sleepers are created equal. The material you choose determines how long the substructure lasts and how often you'll need to replace boards. Three broad categories dominate the market: composite/polymer sleepers, aluminum sleepers, and traditional pressure-treated wood sleepers paired with a moisture barrier.
| Material | Water Absorption | Typical Warranty | Weight per Foot | Best Use Case |
|---|---|---|---|---|
| GFRP (fiberglass-reinforced polymer) | <0.5% | 25–30 years | Light | Rooftops, wet climates |
| Aluminum | 0% | Lifetime (limited) | Very light | Commercial, high-load |
| Pressure-treated wood + EPDM pad | 15%+ | None (wood) | Heavy | Budget, short-term |
GFRP sleepers have become the industry benchmark for residential projects. They combine near-zero water absorption with a weight that's easy to handle during installation. One 8-foot piece typically weighs under 10 pounds, yet it can support a live load of 40 psf—the standard for residential decks—with proper spacing.
Aluminum systems are lighter still and excel in commercial applications where fire rating or 100 psf loading is required. They carry a higher upfront cost but often come with a lifetime warranty. The hidden cost is thermal bridging: aluminum conducts heat, so it demands a thermal break in some climates to prevent frost formation under the deck.
Wood sleepers remain the default choice for DIYers on a tight budget. However, wood must sit on a continuous EPDM strip or similar rubber membrane to break contact with the wet substrate. Even then, screws penetrate the membrane and become corrosion points. Wood sleeper systems can fail within 8 to 10 years if drainage is anything less than perfect. For a more durable foundation that integrates with composite decking, consider a purpose-built joist system designed to handle ground-level moisture without the extra layer of rubber.
Step-by-Step Installation Guide for Concrete & Rooftop Decks
Installing a sleeper system on a flat roof or concrete pad follows a repeatable six-step process. Each step is essential; skip one, and you risk pooling water or squeaking boards within the first season.
- Clean and level the substrate. Remove debris, old adhesive, and any loose material. Use a long straightedge or laser level to map low spots. Fill dips with a self-leveling compound if they exceed 1/4 inch over 10 feet. An uneven base telegraphs through the sleepers and causes wavy decking.
- Apply a drainage mat. Roll out a dimpled drainage membrane or EPDM walkpad across the entire area. This layer protects the roofing from abrasion and creates an uninterrupted path for water to flow to scuppers or drains. Overlap seams by 4 inches and seal them with compatible tape.
- Position and cut sleepers. Lay sleepers perpendicular to the final deck board direction. Maintain a maximum on-center spacing of 16 inches for residential decks, 12 inches for commercial. Mark and cut with a fine-tooth blade; if using GFRP sleepers, a carbide-tipped blade works best.
- Secure sleepers without piercing the roof. This is the critical junction. Use adhesive-bonded pavers or heavy ballast where the roof warranty prohibits fasteners. If fastening is permitted, use stainless steel concrete screws and pre-drill through the sleeper. Place each screw in the low channel of the sleeper to avoid head interference with deck clips.
- Check level and shim. With all sleepers in place, run a string line or laser. Shim any low points with hard plastic shims—never wood shims, which absorb water. Even a 1/8-inch dip multiplies over the deck span and becomes visible.
- Install deck boards and edge trim. Fasten decking to the sleepers using a concealed clip system or stainless screws. Leave a consistent 1/4-inch gap between board ends for expansion. Finish the perimeter with edge trim that allows air to circulate under the deck.
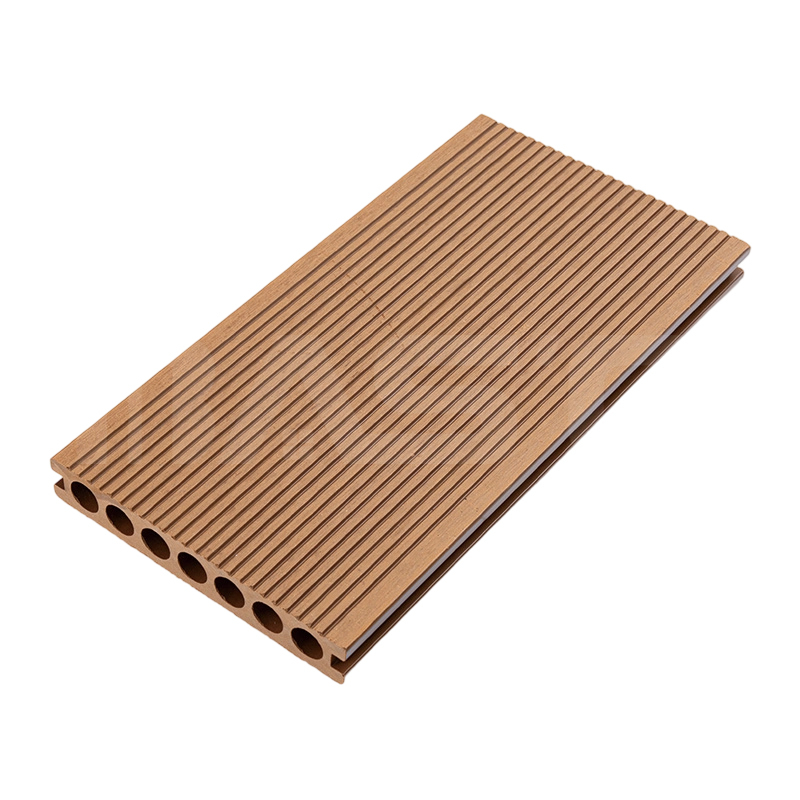
One often-overlooked detail: leave a 2-inch gap between the sleepers and any vertical wall or parapet. That gap is the intake for cross-ventilation. Without it, the under-deck cavity becomes a stagnant humid chamber, and even the best sleepers can't prevent mold on the board undersides.
Cost Breakdown: Sleeper System vs. Traditional Wood Sleepers
Upfront material cost tells only half the story. Over a 15-year horizon, a leaky wood sleeper system often costs more than a premium polymer option once you factor in repairs and shortened deck board life.
| Cost Item | GFRP Sleeper System | Aluminum Sleeper System | Wood Sleeper + EPDM |
|---|---|---|---|
| Sleepers + accessories | $450–$600 | $700–$950 | $180–$250 |
| Drainage membrane | $120–$180 | $100–$150 | $100–$150 |
| Labor (DIY vs. pro) | $0–$800 | $0–$900 | $0–$800 |
| Expected lifespan | 25+ years | 30+ years | 8–12 years |
| Replacement cost (Year 10) | $0 | $0 | $1,200–$2,000 |
| 15-Year Total | $570–$1,580 | $800–$2,000 | $1,480–$3,200 |
The numbers shift dramatically when labor is included. Wood sleepers need replacement at least once during the typical lifespan of a composite deck. That means pulling up the deck boards, disposing of rotted wood, and reinstalling—a job that can double the total project cost. In contrast, GFRP and aluminum sleepers are a one-time purchase. Most composite deck owners who choose a high-end sleeper system never touch the substructure again.
For those pairing sleepers with coextrusion decking, the math becomes even more compelling. The deck boards come with a 25-year warranty and are inherently moisture-resistant, so the substructure becomes the only variable. Over-investing in a cheap sleeper can void the decking warranty if water damage is traced back to improper drainage.
Common Mistakes to Avoid When Installing a Sleeper System
Experience from hundreds of rooftop and concrete deck projects points to a handful of recurring errors. Each mistake has a straightforward fix—but only if caught early.
- Mistake: Blocking the drainage path. Sleepers run parallel to a wall or curb cut-off, trapping water behind them. Consequence: Pooling water freezes in winter, expands, and cracks the membrane or warps sleepers. Solution: Always orient sleepers perpendicular to any down-slope drain. If the layout forces parallel placement, cut 1-inch deep weep channels every 16 inches to break the dam.
- Mistake: Using standard deck screws in treated wood sleepers. ACQ-treated lumber corrodes ordinary zinc-coated screws rapidly. Consequence: Screws lose 30% of their shear strength in 5 years. The deck becomes spongy and unsafe. Solution: Use 305 or 316-grade stainless steel screws with a minimum corrosion rating. The extra $30 per project is cheap insurance.
- Mistake: Spacing sleepers wider than 16 inches on composite decking. Composite boards, especially solid profiles, are flexible and will sag if the support span is too great. Consequence: Bouncy deck boards, visible waves, and clip fatigue. Solution: Follow the deck board manufacturer's span table. Most coextrusion decking requires 16-inch centers; some rigid PVC products demand 12 inches.
- Mistake: Ignoring thermal movement gaps. Sleepers butted tightly against each other or against walls have no room to expand. Consequence: Buckling in summer or gaps opening in winter, stressing the deck fasteners. Solution: Leave a 1/4-inch gap between sleeper ends and 2 inches at perimeter walls.
How to Choose the Right Decking for Your Sleeper System
The sleeper system and the deck boards work as a single unit. A poor pairing can lead to noise, staining, and premature failure. The good news: nearly all modern composite, PVC, and aluminum deck boards are compatible with low-profile sleepers, provided the fastening method is correct.
Composite decking—especially capped coextrusion boards—is the most popular choice. It resists moisture, never needs sealing, and hides the screws or clips needed to anchor to the sleepers. The boards remain stable on GFRP sleepers because the thermal expansion rates of the two materials are relatively close. For a seamless look, a concealed clip system eliminates visible screws while allowing the deck to float slightly over the sleepers, accommodating thermal movement.
Hardwood decking like Ipe or Cumaru can also sit on sleeper systems, but requires pre-drilling and stainless steel screws. There's a catch: oily hardwoods can stain light-colored sleepers, so black polymer or aluminum sleepers are recommended. PVC decking brings the highest moisture resistance of all but is more prone to expansion and contraction; that demands narrower sleeper spacing (12 inches on center) and specialized fasteners.
To simplify selection, use this compatibility matrix for typical residential applications:
| Decking Type | Sleeper Spacing | Recommended Fastener | Notes |
|---|---|---|---|
| Coextrusion composite | 16" o.c. | Concealed clip or stainless screw | Best balance of durability and cost |
| Solid PVC | 12" o.c. | Specialist PVC clip | Higher expansion; needs UV-stable clips |
| Aluminum decking | 16–20" o.c. | Self-tapping stainless screws | Very low expansion; can span further |
| Ipe hardwood | 16" o.c. | Pre-drilled stainless screws | Use dark sleepers to hide oil stains |
The sleeper system itself is only part of the equation. Pairing it with a deck board that aligns in both expansion behavior and fastening method is the difference between a deck that stays flat for 20 years and one that warps after two hot summers.
Our News //
Related News
-
Email: [email protected]
Email: [email protected] -
Tel: +86 13732382108
Tel: +86 18705821696 -
 BLDG#1, LONGOUANWU ECO-INDUSTRIALPARK, MIAOXITOWN, WUXINGDISTRICT. HUZHOU. CHINA

Quick Links
Products Center
Copyright © 2025 Huzhou Baosheng New Material Co., Ltd.All Rights Reserved. Composite Decking Manufacturers Composite Cladding Factory
